by BSR Marketing | Jul 21, 2026 | Uncategorized
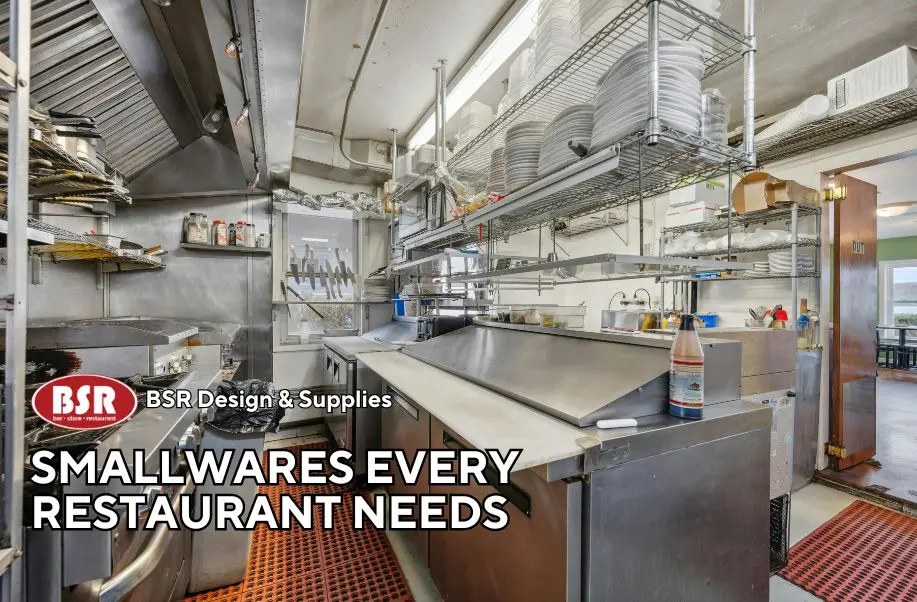
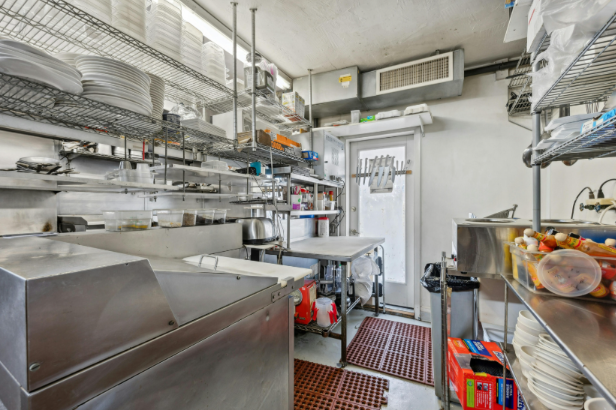
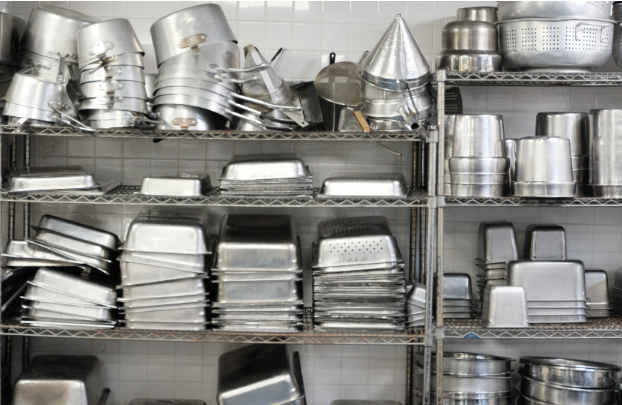
Smallwares are one of the most overlooked parts of restaurant planning. When opening or upgrading a restaurant, most attention goes to big equipment, ovens, refrigeration, and fryers. Those are important, but they’re only part of what makes a kitchen function.
The reality is, once the doors open, it’s not the equipment alone that drives service, it’s the small, everyday tools that keep everything moving. Pans, portioning tools, prep containers, utensils, storage systems, and service tools all become the difference between a kitchen that runs smoothly and one that constantly slows down under pressure.
When smallwares are planned correctly from the start, the entire operation runs smoother. From prep and storage to plating and service, every tool plays a role in keeping the kitchen moving efficiently. Before you start ordering, it’s important to understand exactly what your operation requires.
Start With Your Menu, not a Catalog
Smallwares are often selected without a clear understanding of how a kitchen will operate day to day. Instead of guessing or building a list from a catalog, it’s important to start with a clear look at your menu and service style.
Your menu determines everything:
- Prep tools
- Portioning tools
- Cookware sizes
- Storage containers
- Service tools
Every restaurant is different, and not all operations will require the same quantity of smallwares to function efficiently. Before purchasing, it’s important to determine your true supply and demand rather than ordering random quantities of items.
For example, one restaurant may only need a single case of plates to support its volume, while another may require three or more to keep up with turnover and peak service periods.
Ultimately, it all comes down to understanding your demand. Once you’ve identified what you’ll be serving and how much volume you’ll be handling, the next step is organizing your smallwares around how the kitchen actually functions.
Break Your Kitchen into Stations
The most effective approach is to build your smallwares package around workflow zones.
Prep Station
- Knives
- Mixing bowls
- Cutting boards
- Prep containers
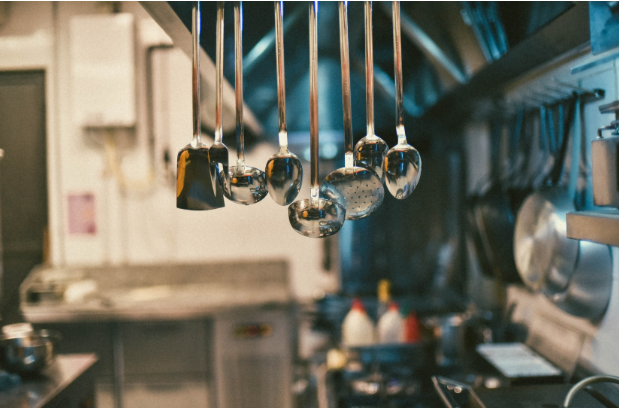
Hot Line
- Pans
- Sheet trays
- Tongs
- Ladles
- Spatulas
- Turners
Cold Prep
Dish Area
- Bus tubs
- Racks
- Scraping tools
- Chemical-safe brushes
- Handling tools
Service
- Plating tools
- Portion spoons
- Garnish tools
- Serving utensils
Organizing smallwares by station helps ensure staff have the tools they need where they need them. It also reduces unnecessary movement, prevents duplicate purchases, and creates a more efficient workflow throughout the kitchen.
Once you’ve identified what tools each station requires, the next step is choosing products that can withstand daily commercial use.
Prioritize Durability Over Price
When purchasing restaurant smallwares and commercial kitchen supplies it can be tempting to choose the lowest- priced option. Cheap smallwares almost always cost more in the long run.
In a busy commercial kitchen lower-quality products tend to:
- Wear out faster under commercial use
- Bend, break, or warp during service
- Create inconsistencies in portioning or prep
- Require frequent replacement, which adds up over time
Investing in commercial grade restaurant supplies helps improve longevity. When selecting commercial kitchen supplies look for:
- Heavy-duty stainless-steel construction
- NSF-rated certification for food safety compliance
- Heat-resistant materials that can handle constant line use
- Stackable, commercial-grade storage solutions that hold up under daily turnover
Choosing quality foodservice supplies from the start can help your operation run more smoothly.
Buy for Peak Service, Not Day One
One of the most common mistakes when purchasing restaurant smallwares is ordering only enough supplies to get through opening day.
While it may be tempting to keep initial costs down, successful commercial kitchen operations require planning for your busiest days, not your easiest ones.
Restaurants face constant fluctuations in demand, including:
- Weekend rushes
- Full dining rooms
- Short-staffed shifts
- Catering orders and private events
- Seasonal increases in customer traffic
If your inventory of commercial kitchen supplies only covers minimum needs, you’ll quickly run into problems during peak service hours.
A well-planned restaurant smallwares package should support your operation during its busiest periods. By purchasing enough foodservice supplies to handle peak volume, you can maintain a smoother workflow, improve efficiency, and keep service consistent even when demand is at its highest.
The Biggest Smallwares Mistakes
Most problems with restaurant smallwares don’t come from bad products, they come from poor planning.
Whether you’re opening a new restaurant or upgrading an existing operation, overlooking smallwares can create inefficiencies that impact daily service and overall commercial kitchen operations.
Some of the most common mistakes include:
-
Ordering restaurant supplies after equipment is already installed
-
Not matching tools directly to menu items or stations
-
Ignoring storage and organization until the end of the project
-
Failing to standardize tools across shifts and stations
Many of these issues don’t become obvious until the kitchen is operating at full capacity. Missing tools, inconsistent portioning, and disorganized storage can create delays that affect both staff productivity and the guest experience.
Taking the time to properly plan your smallwares package upfront can prevent these problems before they impact service.
Ready to Build Your Smallwares Package?
Whether you’re opening a new restaurant or have been serving customers for years, having the right smallwares on hand is essential to efficient operations.
Our team can help you select the right supplies today and continue supporting your operation with replacement products, additional inventory, and equipment solutions as your needs change. Even after you’ve been open for months or years, we’re here to help keep your kitchen running smoothly.
Contact Chelsey Jones today to discuss your commercial restaurant supply needs and find the right solutions for your operation.
by BSR Marketing | Jul 7, 2026 | Restaurant Supply, Salad bar
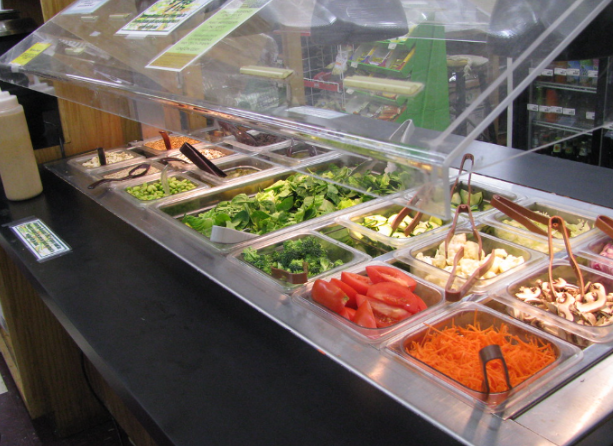
Many restaurant owners assume they need a large dining room to offer a salad bar. In reality, a well-designed restaurant salad bar can fit into surprisingly small spaces while creating an additional revenue stream, improving guest satisfaction, and increasing average ticket size.
The key isn’t having more space; it’s making better use of the space you already have.
Whether you’re planning a new restaurant or upgrading your current operation, thoughtful commercial kitchen design can help you build a salad bar that improves efficiency for both employees and customers.
Here’s how to create a restaurant salad bar that maximizes every square foot.
Start With Traffic Flow
Before selecting equipment, think about how guests will move through the space.
One of the biggest mistakes operators make when planning a restaurant kitchen layout is choosing equipment first and worrying about customer flow later. Even the highest-quality salad bar equipment won’t perform well if guests constantly run into each other or staff must cross customer traffic to refill ingredients.
Ask yourself:
- Where will customers enter the line?
- How will they move from one ingredient to the next?
- Where will they pay?
- Can multiple guests build salads at the same time?
- Will staff have easy access for refilling ingredients without interrupting customers?
A well-planned layout keeps guests moving naturally from start to finish while reducing congestion during busy meal periods. It also makes the station easier for employees to maintain throughout service.
Pro Tip
Position your salad bar where guests naturally walk instead of forcing them into a separate traffic pattern. A convenient location encourages more customers to stop, increasing participation and boosting food sales.

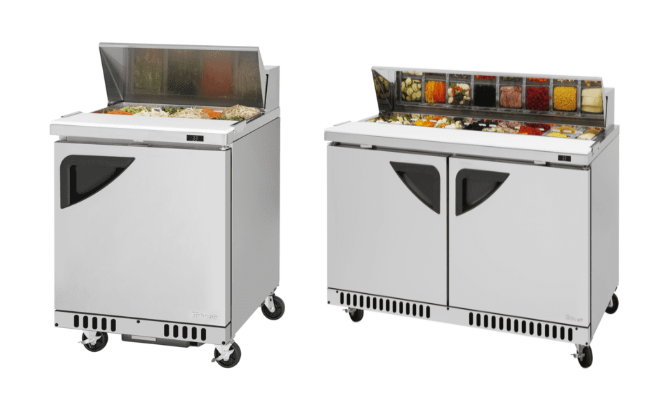
Choose the Right Refrigerated Prep Table
For many foodservice operations, refrigerated commercial prep tables serve as the foundation of an efficient salad bar.
Rather than separating refrigeration, storage, and food preparation into multiple pieces of equipment, prep tables combine everything into one compact workstation. This keeps ingredients within easy reach while reducing unnecessary movement for kitchen staff.
The result is faster prep times, better organization, improved food safety, and more efficient use of valuable kitchen space.
Salad & Sandwich Prep Refrigerators
Commercial Salad and sandwich prep refrigerators are designed for restaurants that prepare made-to-order salads, wraps, sandwiches, and cold menu items throughout the day.
These units typically include:
- Refrigerated ingredient pans
- Convenient cutting and assembly surface
- Under-counter refrigerated storage
- Easy access to frequently used ingredients
- Faster preparation during busy service
They’re an excellent choice for cafés, sandwich shops, delis, universities, healthcare facilities, and fast-casual restaurants looking for compact commercial salad bar equipment.
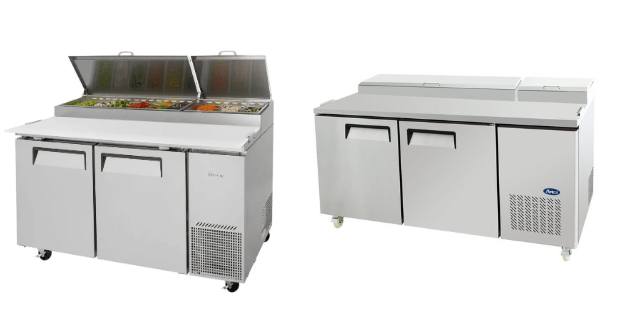
Pizza Prep Refrigerators
While designed for pizza production, pizza prep refrigerators can also be an outstanding solution for salad-focused operations.
Their larger ingredient rails allow restaurants to store a greater variety of vegetables, cheeses, proteins, fruits, and specialty toppings without constantly restocking during peak hours.
Benefits include:
- Larger ingredient capacity
- Expanded preparation workspace
- Better ingredient organization
- Faster assembly for customizable menu items
- Improved efficiency during high-volume service
Restaurants offering build-your-own salads, grain bowls, wraps, or pizzas often benefit from the additional flexibility these units provide.
Why Refrigerated Prep Tables Work in Small Spaces
Not every restaurant has room for a large, traditional commercial salad bar.
That’s why many operators choose refrigerated prep tables instead.
By combining refrigerated storage, ingredient organization, and food preparation into a single footprint, these units eliminate the need for multiple pieces of equipment while keeping ingredients fresh and easily accessible.
For restaurants with limited square footage, this approach creates a cleaner workflow, minimizes employee movement, and maximizes every inch of available space.
Prioritize Refrigeration Performance
Fresh produce is only as good as the equipment keeping it cold.
Reliable refrigeration protects food quality, extends ingredient life, reduces waste, and helps restaurants meet local food safety regulations.
When comparing commercial salad bar equipment, look for features such as:
- Heavy-duty stainless-steel construction
- High-performance refrigeration systems
- Adjustable ingredients pan configurations
- Durable sneeze guards
- Easy-to-clean surfaces
- Energy-efficient operation
Investing in quality refrigeration often lowers maintenance costs while helping your equipment perform consistently for years.

Design for Easy Restocking
A successful salad bar isn’t just convenient for customers; it should also be simple for employees to maintain.
Consider how staff will refill ingredients throughout the day without interrupting guests. Position backup refrigerated storage nearby and leave enough workspace behind the station for employees to safely replace pans, clean surfaces, and monitor food temperatures.
An organized restocking process reduces downtime, keeps ingredients fresh, and helps maintain an attractive presentation throughout service.
Maximize Food Presentation
Guests eat with their eyes first.
An organized, well-stocked salad bar encourages customers to add more toppings and often leads to higher ticket averages.
Arrange ingredients from lighter items to heavier proteins, keep colors balanced throughout the display, and avoid overcrowding ingredient pans. Fresh-looking produce, clean sneeze guards, and neatly organized toppings create a more inviting experience while reinforcing your commitment to quality.
Simple presentation improvements can make a significant difference in customer perception and overall sales.
One of the smartest investments you can make is designing a salad bar that can grow alongside your business.
As customer demand increases, you may want to add:
Planning for future expansion during the initial design phase can help avoid expensive renovations and equipment relocations later.

Keep Cleaning and Maintenance in Mind
Daily cleaning is one of the most overlooked aspects of salad bar design.
Choosing equipment with removable ingredient pans, rounded interior corners, accessible refrigeration components, and durable stainless-steel surfaces make cleaning faster and helps maintain food safety standards.
Routine maintenance also improves refrigeration performance and extends the lifespan of your investment, reducing costly repairs over time.
Need Help Designing a Salad Bar?
A successful salad bar isn’t just about fitting equipment into a room; it’s about creating an efficient flow that supports both guests and staff while maximizing every square foot of available space.
From layout planning to equipment selection, every decision impacts speed of service, food safety, and overall operational efficiency. Choosing the right salad bar equipment, including refrigerated prep tables and sandwich or pizza prep refrigerators, can help restaurants build a more streamlined and profitable food service area.
BSR specializes in helping restaurants, cafés, delis, and foodservice operations design efficient layouts and select the right equipment for long-term performance.
If you’re planning a new restaurant salad bar or upgrading an existing one, contact BSR today. We’ll help you design a commercial kitchen that makes the most of your space while recommending the right equipment to keep your operation running efficiently for years to come.

by BSR Marketing | Jun 23, 2026 | Uncategorized
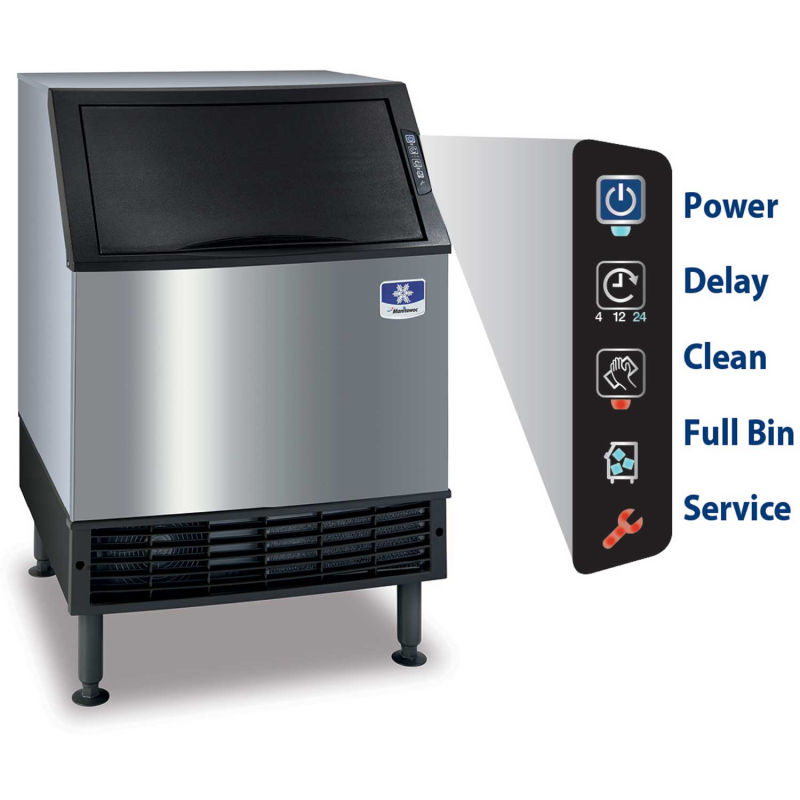
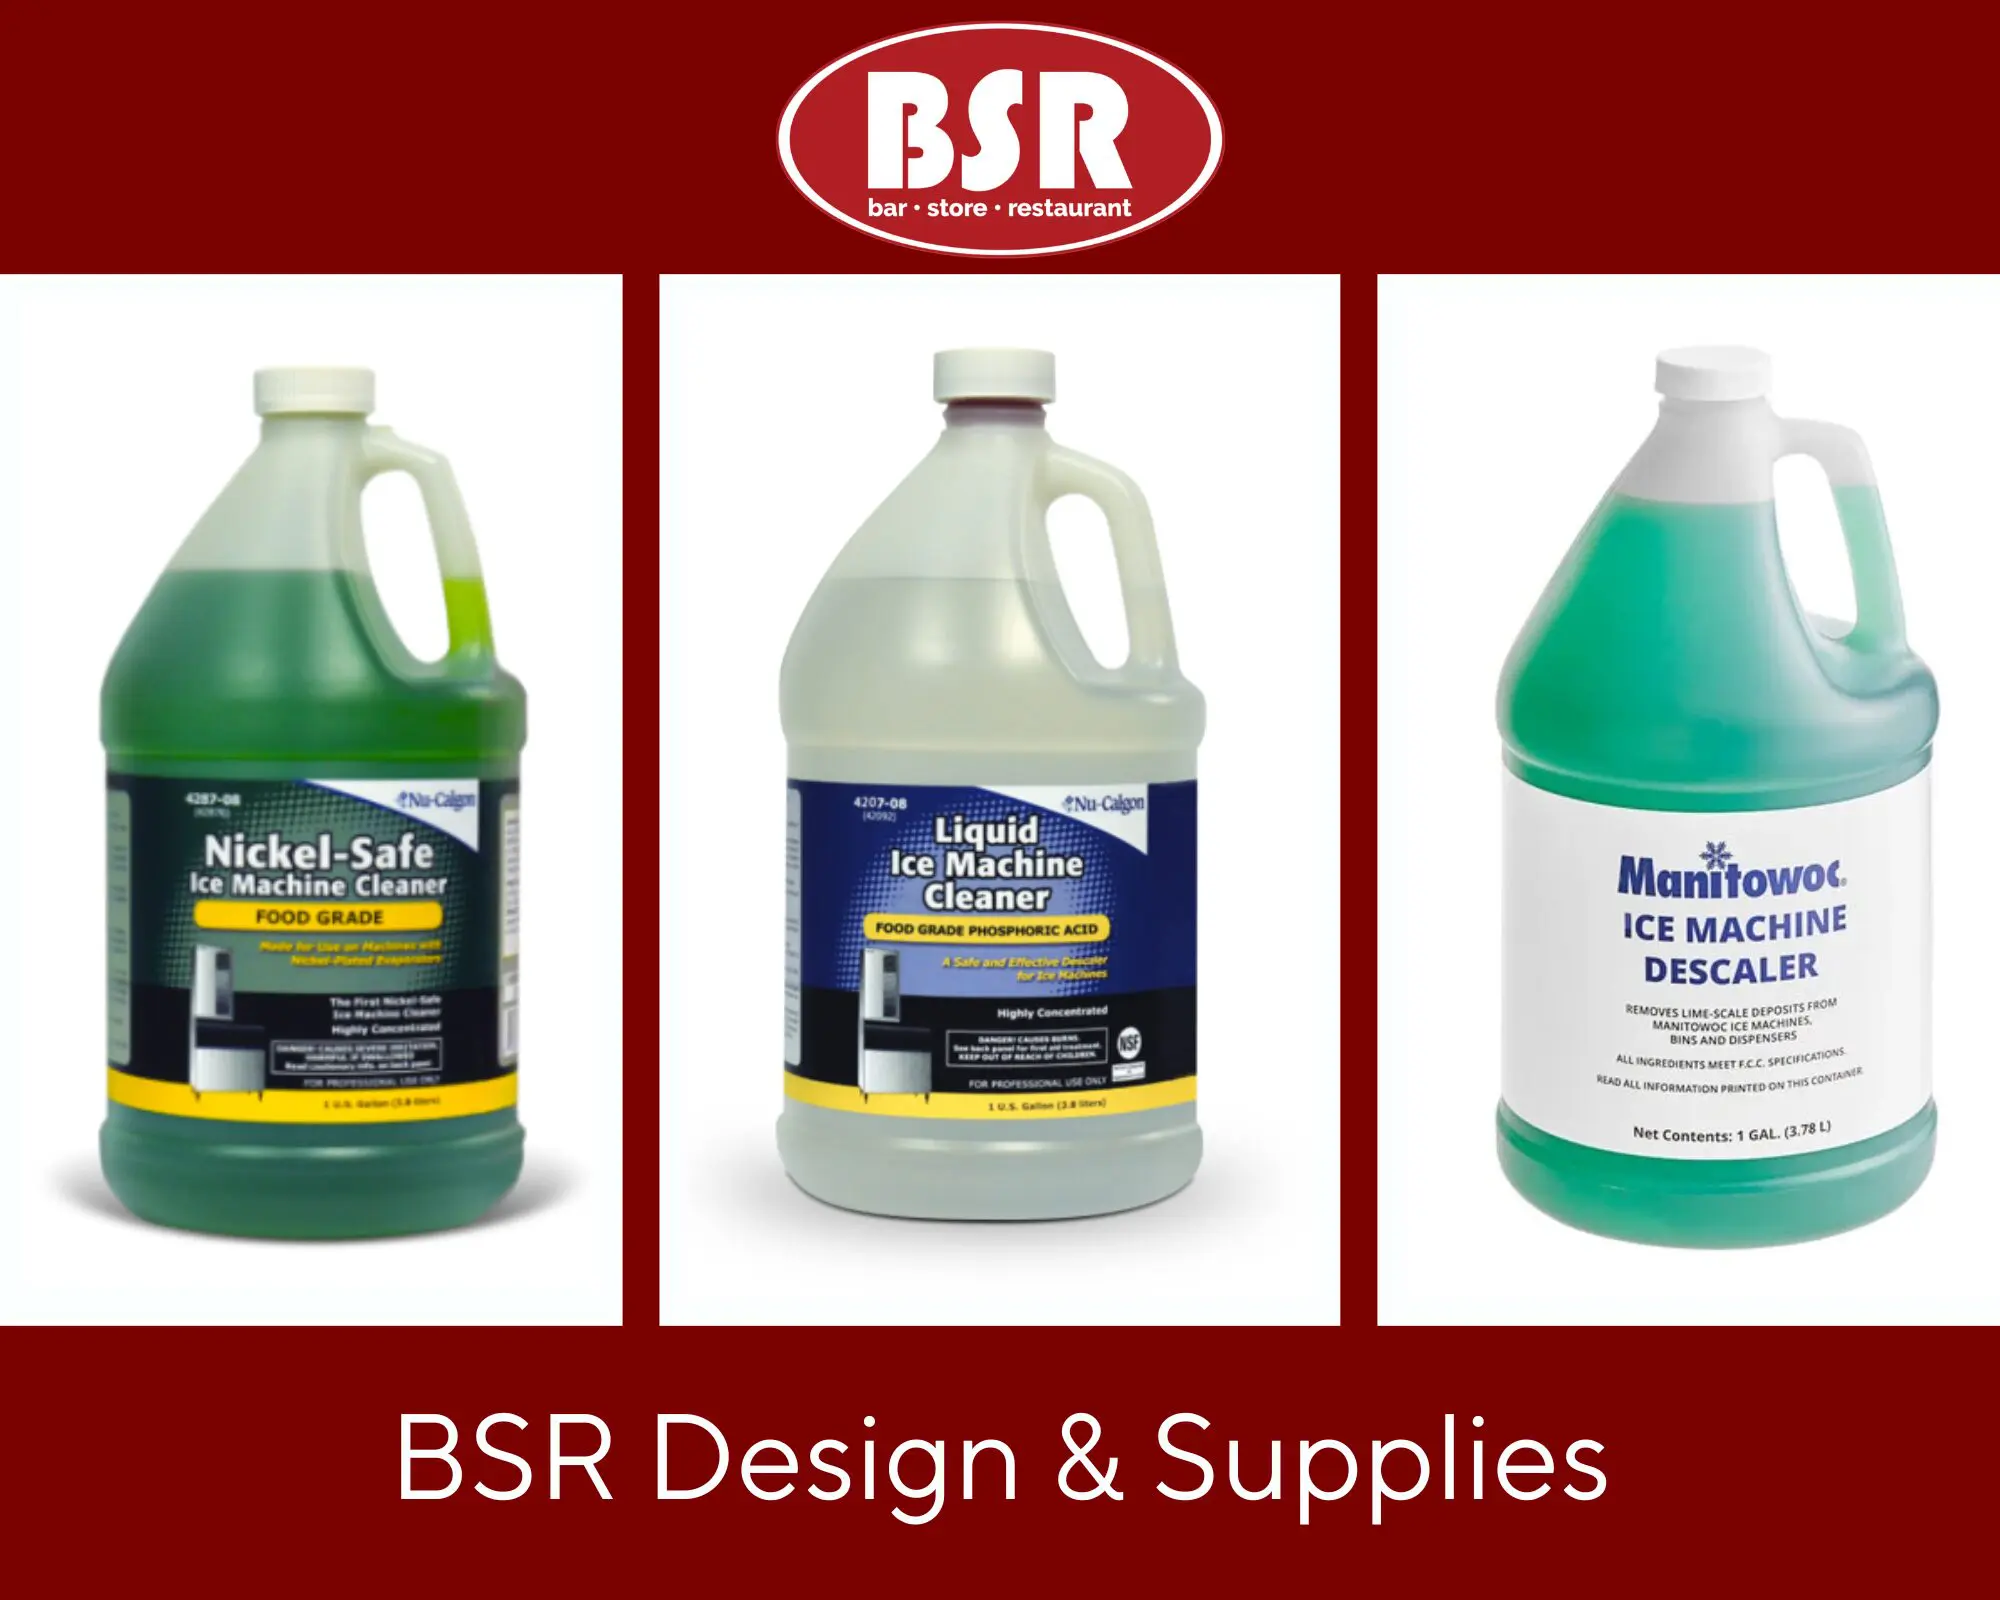
Regular cleaning with a commercial ice maker helps prevent scale buildup, mold, slime, off-tasting ice, and reduced production. Most manufacturers recommend cleaning and sanitizing every 3–6 months, though hard water or high-volume operations may require more frequent service.
What You’ll Need
- Ice machine cleaner (approved by the manufacturer)
- Food-safe sanitizer
- Soft cloths or sponges
- Soft brush or nylon brush
- Warm water
- Gloves
Avoid abrasive pads, steel wool, or harsh chemicals that can damage components.
Step 1: Turn Off the Ice Machine
- Turn off the ice-making cycle.
- Disconnect power if recommended by the manufacturer.
- Shut off the water supply if required.
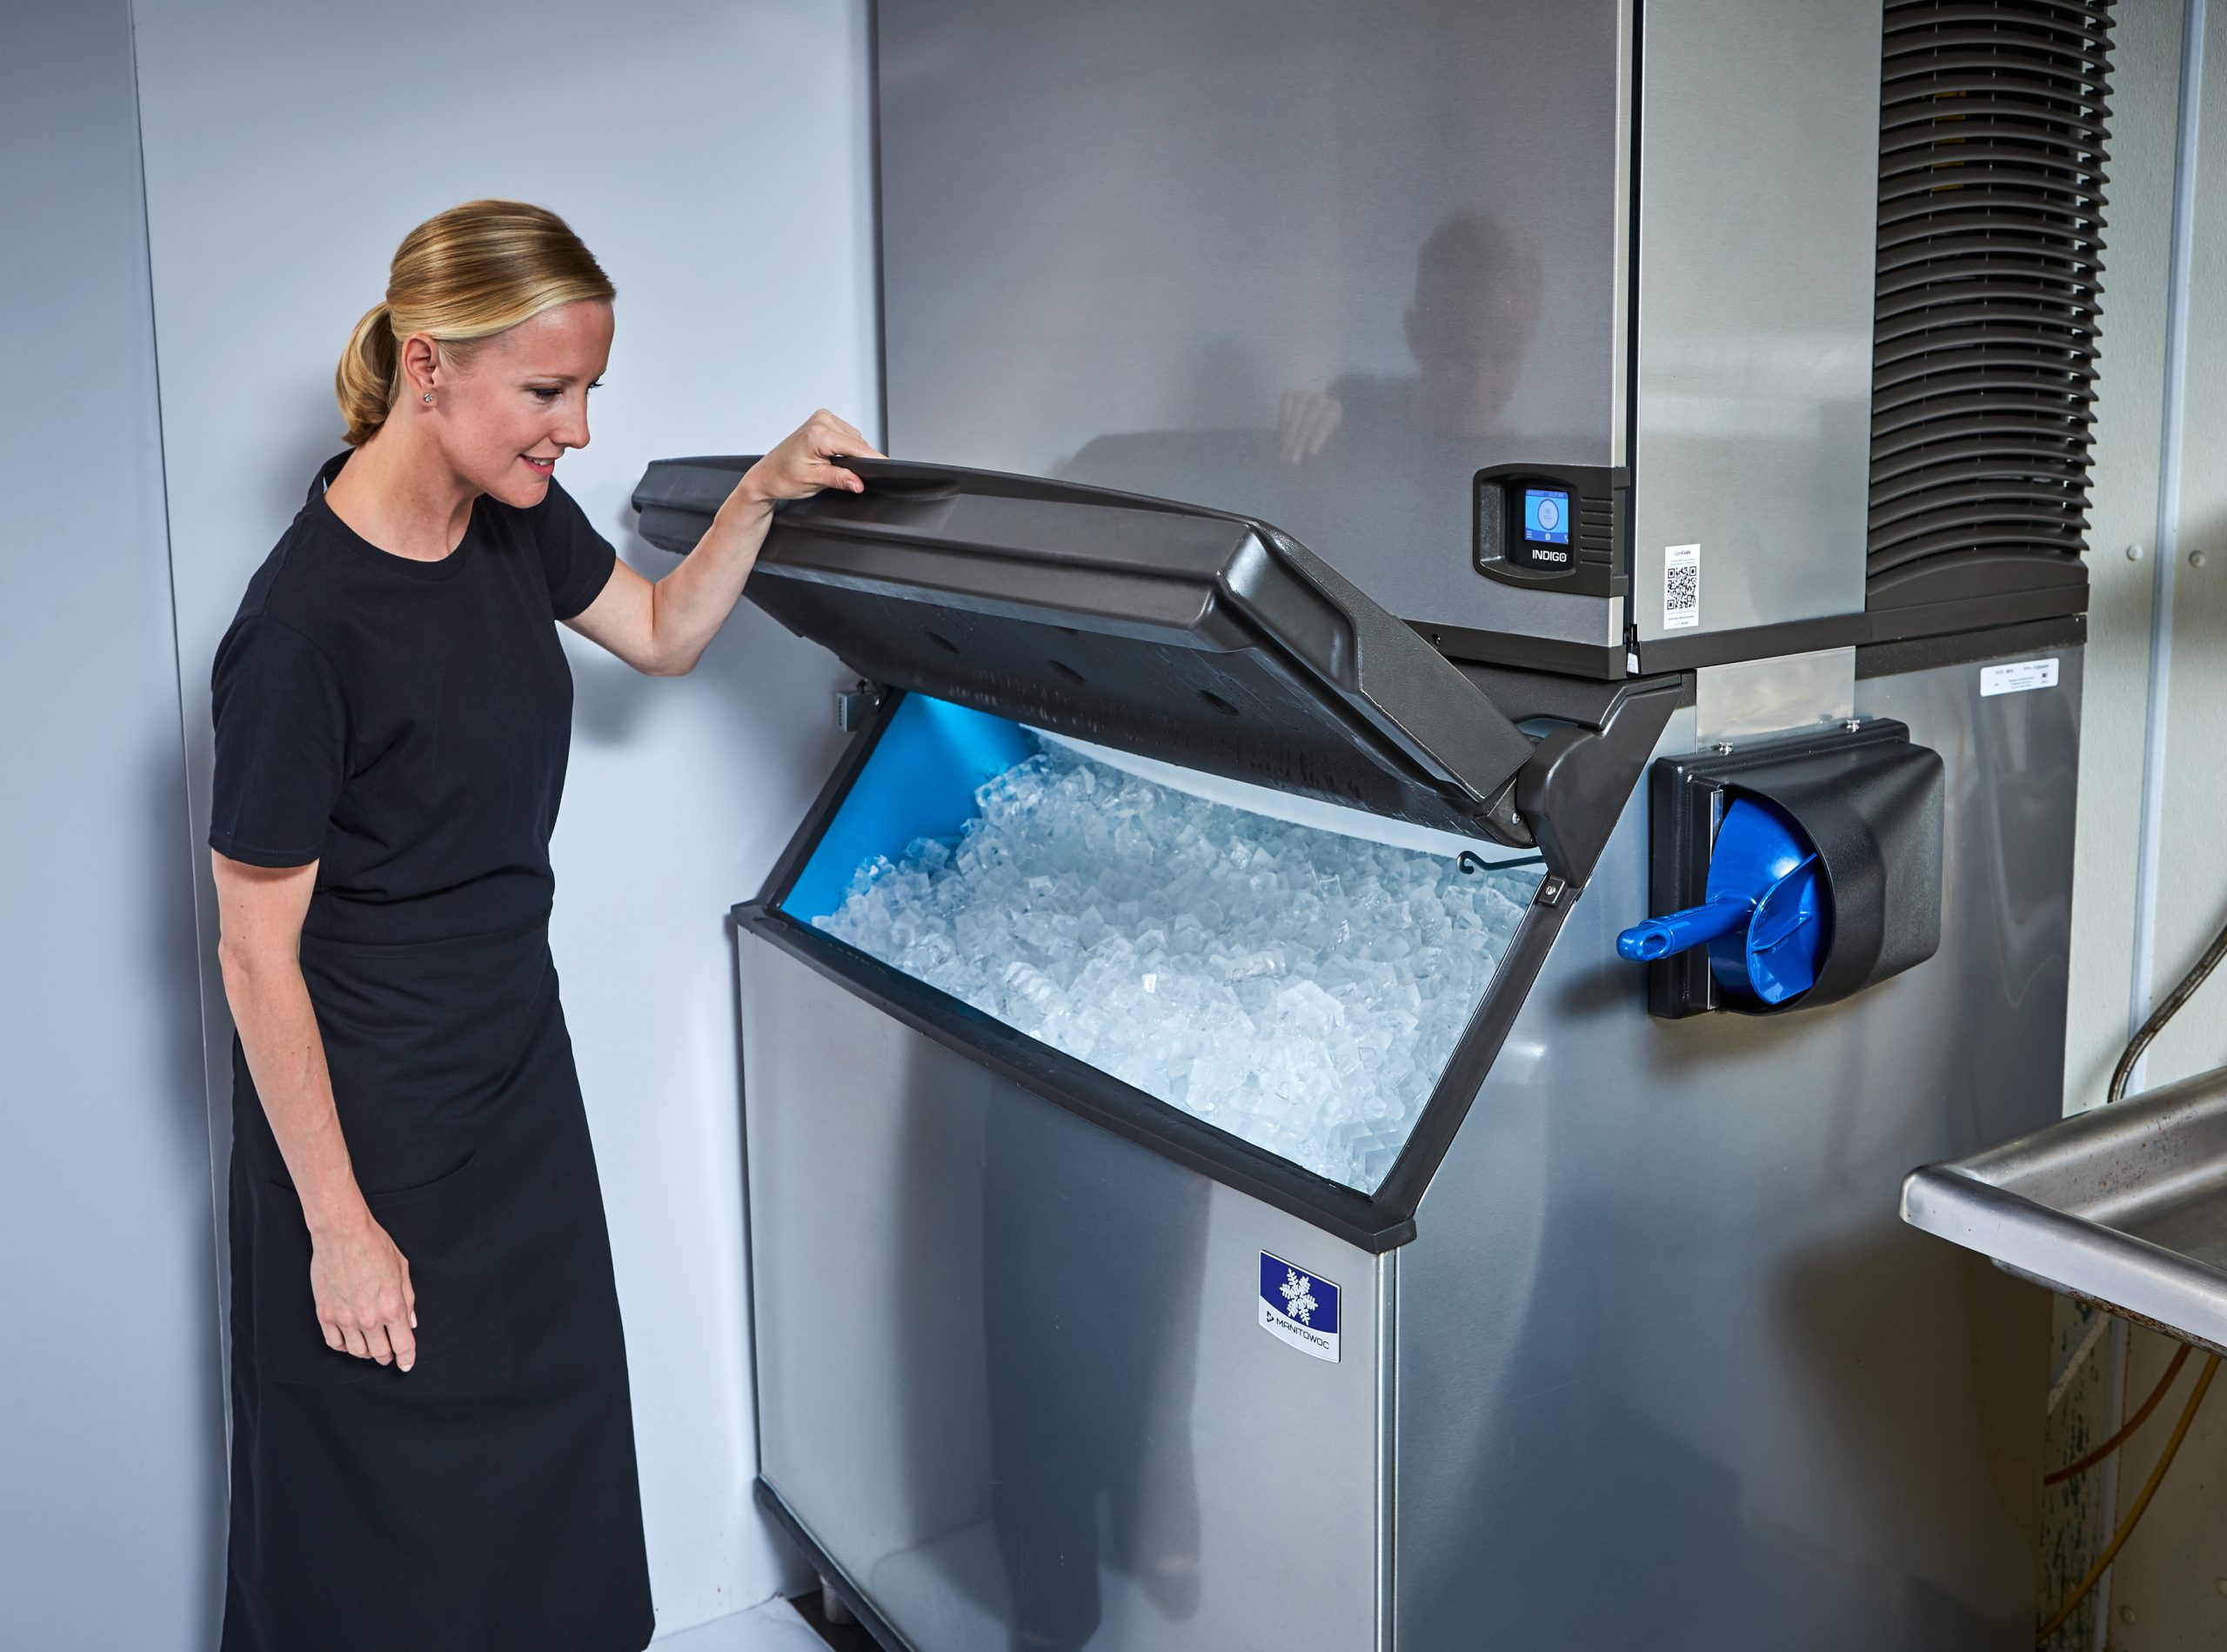
Step 2: Remove All Ice
- Empty the ice bin completely.
- Discard any ice produced during the cleaning process.
Step 3: Remove Components
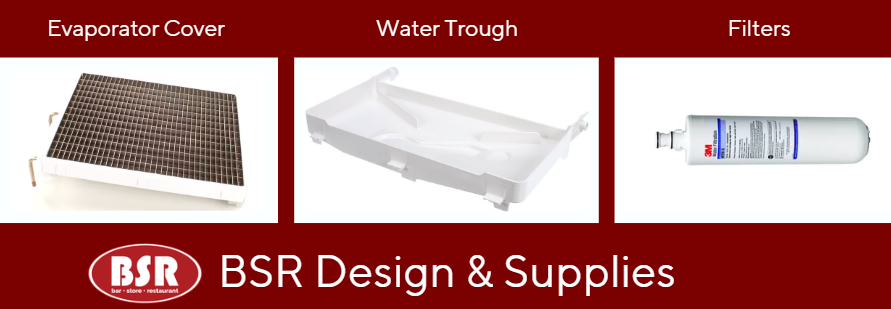
Depending on the model, remove:
- Water curtain
- Distribution tubes
- Water trough
- Evaporator cover
- Filters
Check the equipment manual for parts that can be safely removed
Step 4: Clean Mineral Scale
- Mix the manufacturer’s approved ice machine cleaner according to directions.
- Apply the solution to scaled surfaces.
- Soak removable parts if needed.
- Gently brush away mineral deposits.
Hard water often causes white or chalky buildup on evaporators and water distribution components.
Step 5: Run the Cleaning Cycle
Many commercial ice machines have an automatic cleaning mode.
- Add the cleaning solution as directed.
- Start the cleaning cycle.
- Allow the ice machine to circulate the cleaner through the system.
Step 6: Rinse Thoroughly
- Drain the cleaning solution.
- Rinse removable parts with clean water.
- Run fresh water through the system to remove any cleaner residue.
Step 7: Sanitize the Machine
- Mix a food-safe sanitizer according to label instructions.
- Apply it to interior surfaces, the ice bin, and removable components.
- Run the sanitizing cycle if your machine includes one.
Sanitizing kills bacteria, mold, and yeast that cleaning alone may not remove.

Step 8: Reassemble and Restart
- Reinstall all components.
- Restore power and water.
- Restart the ice maker.
- Replace the old filter
Step 9: Discard the First Batch
The first batch of ice after cleaning should be discarded to ensure no cleaning or sanitizing residue remains.
Signs Your Ice Machine Needs Cleaning
- Reduced ice production
- Smaller ice cubes
- Cloudy or foul-smelling ice
- Slime or mold in the bin
- Increased service calls
- Visible scale buildup

Best Practice for Restaurants
A good maintenance schedule is:
- Weekly: Wipe down exterior surfaces and inspect the ice bin.
- Monthly: Check filters and water quality.
- Every 3–6 months: Full cleaning and sanitizing.
- Annually: Professional preventive maintenance inspection.
Consistent cleaning extends equipment life, improves ice quality, and helps maintain food-safety compliance.
Not all ice machines are the same. If you have questions about cleaning or need new filters, give us a call. We can help identify the right filter and take a look at your machine to make sure it’s operating properly.

by BSR Marketing | Jun 9, 2026 | Uncategorized
Dirty sodas are quickly becoming one of the fastest-growing beverage trends in restaurants, cafés, and quick-service concepts. What started as a niche soda-shop idea has turned into a high-margin beverage category that drives repeat customers, social media engagement, and increased revenue.
Most restaurants assume dirty sodas only require a soda fountain and flavored syrups. But once volume increases, the beverage station becomes a complete workflow system. The difference between a slow, cluttered counter and a fast, profitable beverage station usually comes down to equipment selection and layout design.
For many operators, dirty sodas have become one of the easiest ways to increase beverage revenue without expanding the kitchen or adding complicated prep. The key is building the right dirty soda equipment setup from the start.
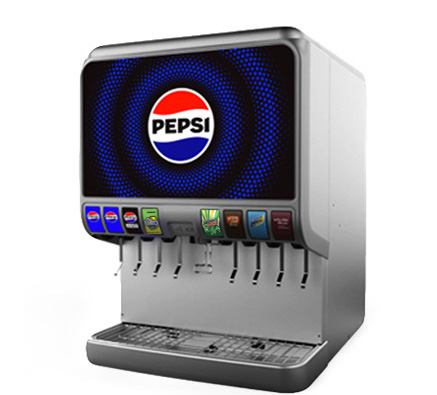
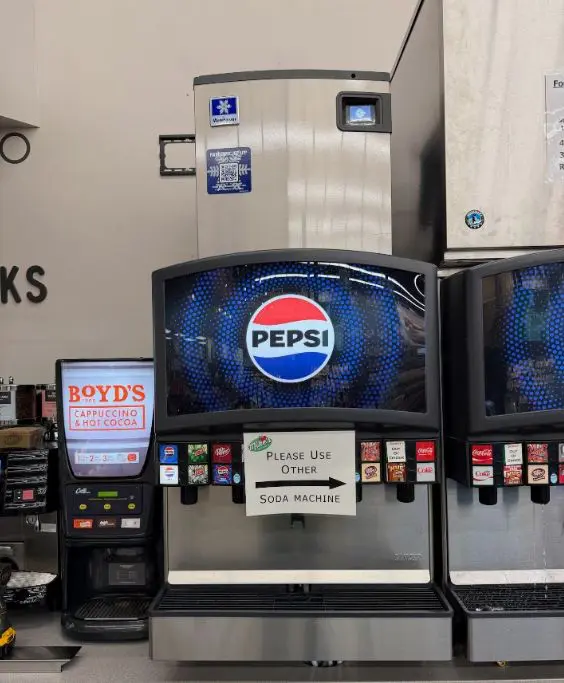
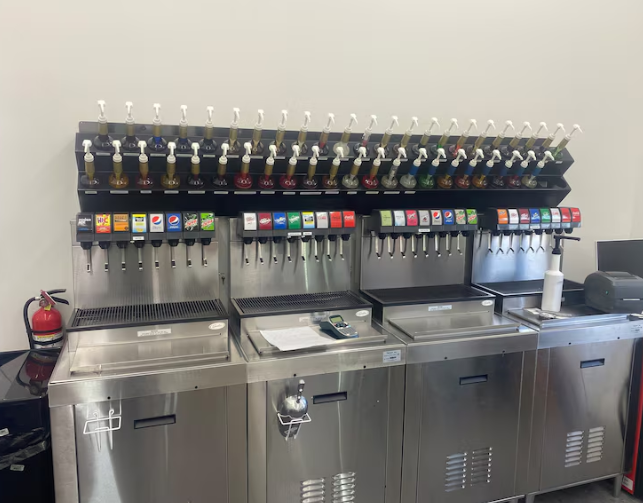
1. Soda Fountain Systems
The soda fountain is the foundation of any dirty soda station. Every drink starts here, so speed, consistency, and variety are critical.
Most restaurants rely on:
- Coke fountain systems
- Pepsi fountain systems
- traditional multi-head soda dispensers
Each system can work, but high-volume operators prioritize setups that allow quick flavor access, reliable carbonation, and easy cleaning.
Because dirty soda menus are highly customizable, the system needs to handle constant variation without slowing down service. A well-designed soda fountain setup keeps employees moving efficiently while maintaining consistent drink quality.


2. Ice Machines: The Most Important Piece of Dirty Soda Equipment
Most operators don’t realize how much ice dirty sodas actually consume until the station gets busy. Unlike traditional fountain drinks, dirty sodas use oversized cups and heavy ice builds, making ice a core part of both the drink and the experience. Nugget ice has become especially popular because customers associate it with a premium, specialty beverage feel.
Placement also matters, keeping the ice machine close to the soda fountain helps reduce movement and keeps service fast during peak rush periods.
3. Syrup Storage and Dispensing Systems
One of the biggest operational challenges in dirty soda stations is syrup organization.
Without a proper system, beverage counters quickly become cluttered, especially during busy service periods when drinks are heavily customized.
High-performing beverage stations often use:
The goal is simple: keep flavors easy to access, visually organized, and consistent in portioning.
A well-structured syrup system improves speed of service, reduces waste, and keeps the beverage station clean and professional-looking throughout the day.
4. Cup, Lid and Straw Organization
Speed in a dirty soda station often comes down to small details.
When employees waste time searching for cups, lids, straws, or toppings, the entire workflow slows down. That’s why efficient beverage station design focuses heavily on organization and accessibility.
Efficient dirty soda stations usually include:
- vertical cup dispensers
- organized lid storage
- straw dispensers
- topping bins
- mobile storage systems
These small layout improvements have a major impact during peak hours. In beverage-heavy concepts, organization is just as important as equipment.
5. Popular Dirty Soda Combinations
Dirty soda menus are built around customization, but a few flavor combinations consistently perform well in restaurants and soda shops.
Popular combinations include:
- Dr Pepper + coconut + vanilla cream
- Sprite + peach + strawberry puree
- Coke + cherry + lime
- Mountain Dew + raspberry + sweet cream
- Energy drink refreshers with fruit syrups
As menus expand into seasonal flavors, frozen variations, and energy-based drinks, the demand on the dirty soda equipment increases. More customization means more need for efficient syrup storage, refrigeration, and workflow design.
 ,
,

6. Why Workflow Matters More Than Operators Think
A successful dirty soda station isn’t just about having the right equipment; it’s about how everything works together during service. Small layout decisions directly impact ticket times, labor efficiency, customer experience, and drive-thru speed. When the station is designed properly, employees can build drinks faster, restock easily, and keep service moving during peak hours.
When equipment and workflow are aligned, beverage stations become high-margin revenue centers that improve speed, sales, and overall efficiency.
If you’re planning a dirty soda station or upgrading your beverage program, getting the equipment and layout right from the start makes a major difference in long-term performance and profitability.
by BSR Marketing | May 26, 2026 | Uncategorized
Commercial kitchens are under more pressure than ever. Rising labor costs, limited kitchen space, and the demand for faster ticket times are forcing operators to rethink how their back-of-house is designed. The old model of using multiple single-purpose appliances is becoming inefficient, expensive, and difficult to scale.
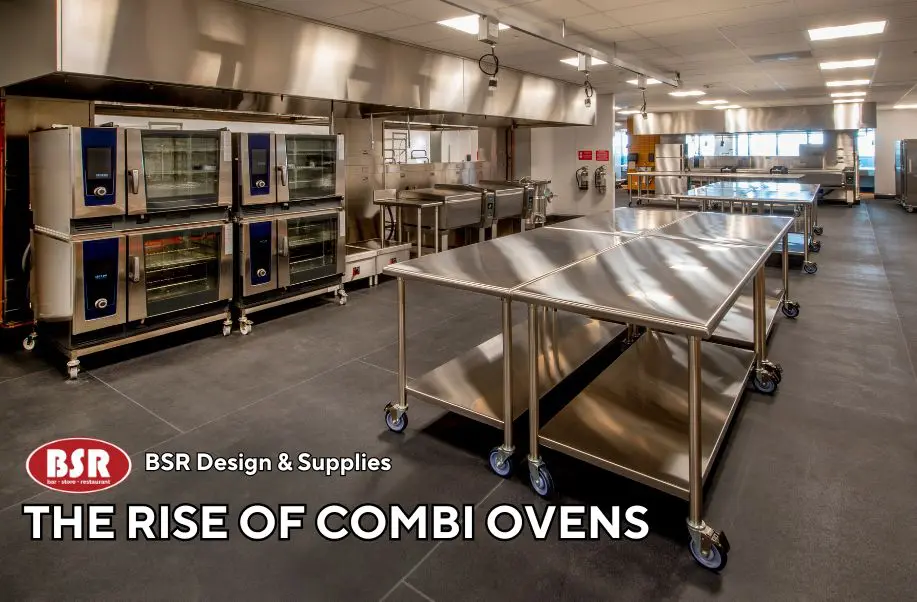
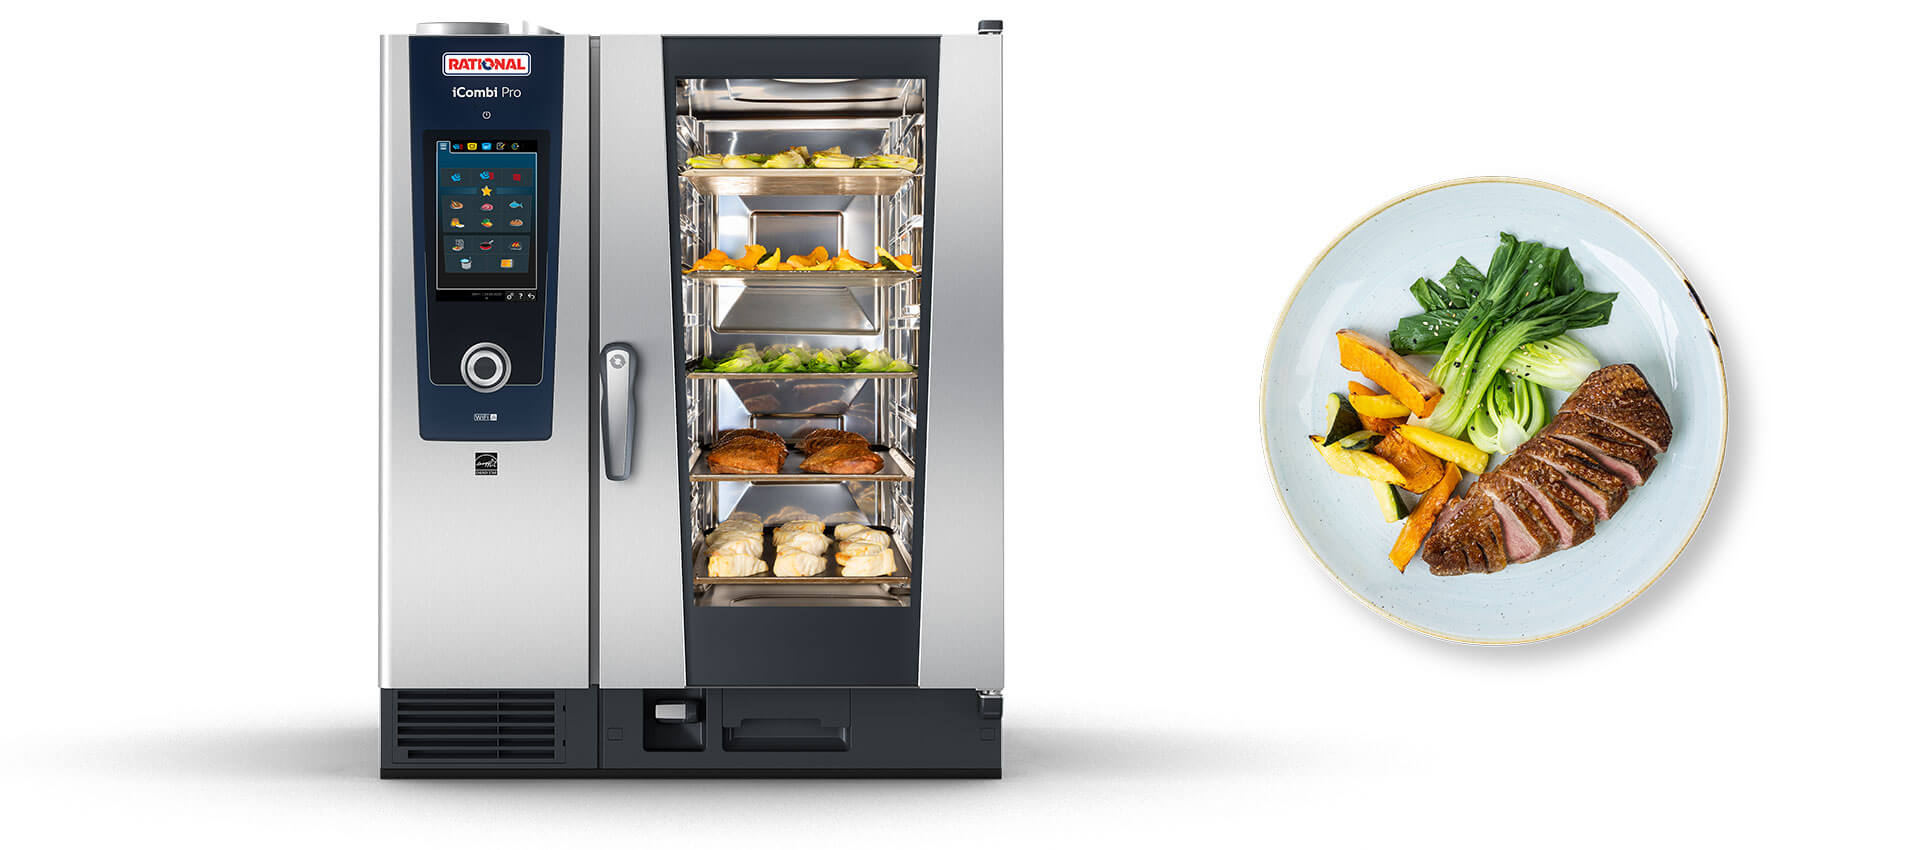
That’s why combi ovens have become one of the most important shifts in modern commercial kitchen design.
Instead of relying on separate steamers, convection ovens, proofers, and holding cabinets, a combi oven combines all of those functions into one intelligent cooking system. For restaurants, cafés, ghost kitchens, and institutional foodservice operations, this means more output from a smaller footprint, tighter control over food quality, and less reliance on highly skilled labor.
As commercial kitchens continue to prioritize speed, consistency, and efficiency, combi ovens are no longer a “nice upgrade” they’re becoming a core part of how high-performing kitchens are built.
1. One Piece of Equipment Replacing Multiple Stations
Many operators are moving away from single-purpose equipment and shifting toward multi-function commercial cooking equipment that can handle multiple tasks in one unit. Combi ovens are changing how commercial kitchens operate by allowing teams to steam, roast, bake, grill, regenerate, and hold a wide variety of menu items in a single piece of restaurant cooking equipment.
As a result, many operators are realizing they don’t necessarily need more equipment, they need smarter, more efficient commercial kitchen solutions. This level of flexibility allows kitchens to simplify their cook line while still maintaining strong production capacity, kitchen workflow efficiency, and consistency during service.
2. Labor Costs and Kitchen Efficiency
Kitchens are being designed around labor efficiency in commercial kitchens, not ideal staffing levels. In many restaurants, the amount of prep work, training, and hands-on production required can be reduced with a commercial combi oven because operators can program custom recipes, cook times, and settings directly into the equipment.
These presets help ensure each dish is cooked consistently and ready to serve with minimal guesswork. Many operators see reduced labor dependency and improved throughput as a result of automating repeatable cooking processes inside a combi oven. Instead of constantly monitoring multiple pans, pots, and cooking stations, staff can rely on automated cooking programs that simplify restaurant kitchen workflow throughout the day.
This also helps reduce dish volume, unnecessary movement, and inefficiencies during peak restaurant service operations. Restaurants can spend less time on extensive training while still maintaining consistent food quality across staff members and shifts.
3. Space Is Becoming More Valuable
As more operators move toward smaller footprints, pickup-focused concepts, and faster service models, every square foot in a commercial kitchen layout matters more than ever.
Combi ovens are becoming a key solution for ghost kitchens, fast-casual restaurants, and high-efficiency restaurant kitchens because they help streamline production while taking up less space than multiple traditional cooking appliances. Operators can combine several cooking functions into one compact commercial cooking system footprint.
That flexibility helps kitchens move faster during peak hours while improving kitchen workflow efficiency in restaurants and simplifying workflow in tighter spaces.
Combi ovens can also help reduce operational costs. Many models are designed to lower energy consumption in commercial kitchens and water usage in restaurant equipment compared to traditional equipment setups. Rather than adding more equipment, many modern kitchens are focusing on smarter layouts and multi-function cooking equipment solutions that allow them to produce more with less space.
4. Combi Ovens vs Traditional Commercial Ovens
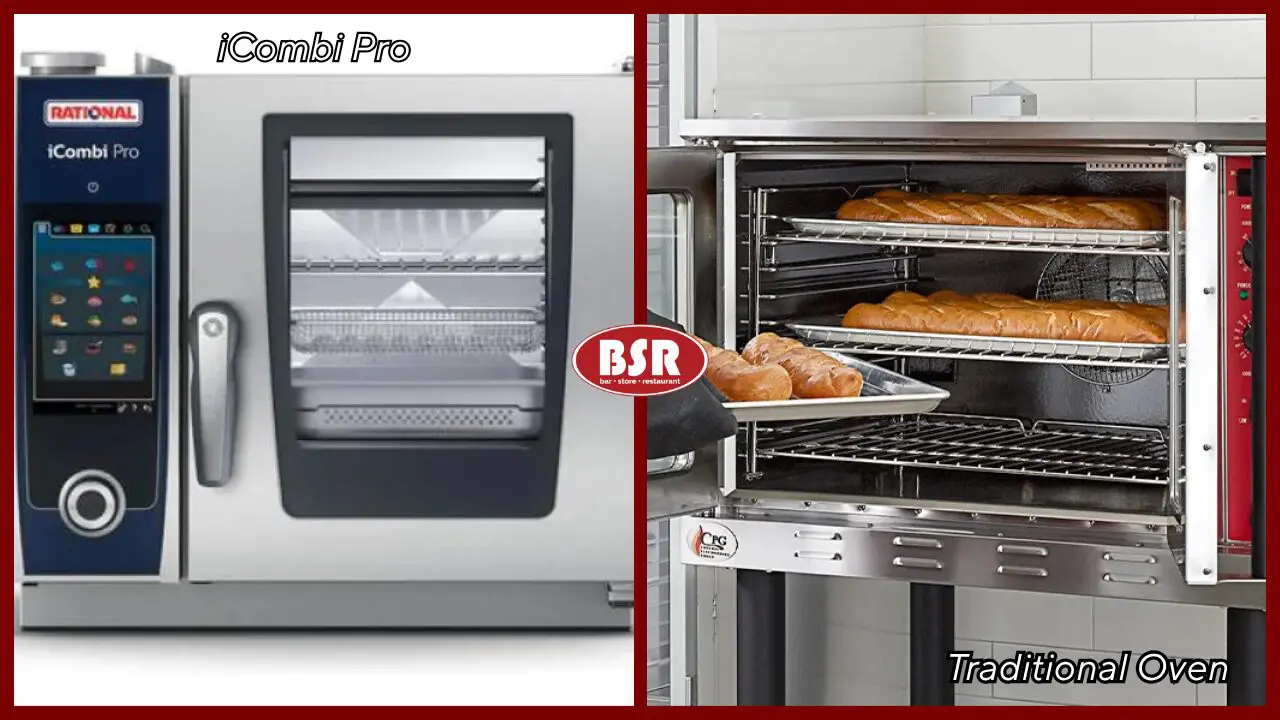
Traditional commercial ovens are built for one primary function: dry heat cooking. While they’re reliable for roasting and baking, they require multiple additional pieces of equipment to handle the full range of modern menu demands with steamers for moisture control, holding cabinets for service, and separate equipment for regeneration or batch cooking.
A combi oven changes that entire workflow.
With steam, convection, and combination cooking modes, a combi oven gives operators precise control over humidity, temperature, and airflow inside a single unit. That means chefs can roast proteins without drying them out, bake with more consistent results, steam vegetables without separate equipment, and reheat prepped items while maintaining texture and quality.
In short:
- Traditional ovens = single purpose + multiple machines required
- Combi ovens = multi-function + streamlined cook line design
This shift is one of the reasons so many modern kitchens are redesigning their layouts around combi technology instead of traditional equipment banks.
5. Menu Flexibility and Consistency
One of the biggest advantages of a combi oven isn’t just efficiency, it’s menu flexibility.
Instead of building a menu around equipment limitations, kitchens can now build equipment usage around the menu.
With programmable recipes and cooking presets, staff can execute complex dishes consistently without relying on highly trained chefs for every station. That means a single unit can handle roasting proteins, baking pastries, steaming vegetables, regenerating prepped meals, and even holding food at precise temperatures during service.
This creates two major operational advantages:
First, consistency improves across shifts and staff skill levels. Once a recipe is programmed, it reduces variation in execution and helps maintain food quality during high-volume service.
Second, menu expansion becomes easier. Operators can introduce new items without needing additional equipment or major kitchen redesigns, which is especially important for fast-casual concepts, ghost kitchens, and growing restaurant groups.
Ultimately, combi ovens give operators something traditional kitchens struggle with flexibility without complexity.
The Future of Commercial Cooking Equipment.
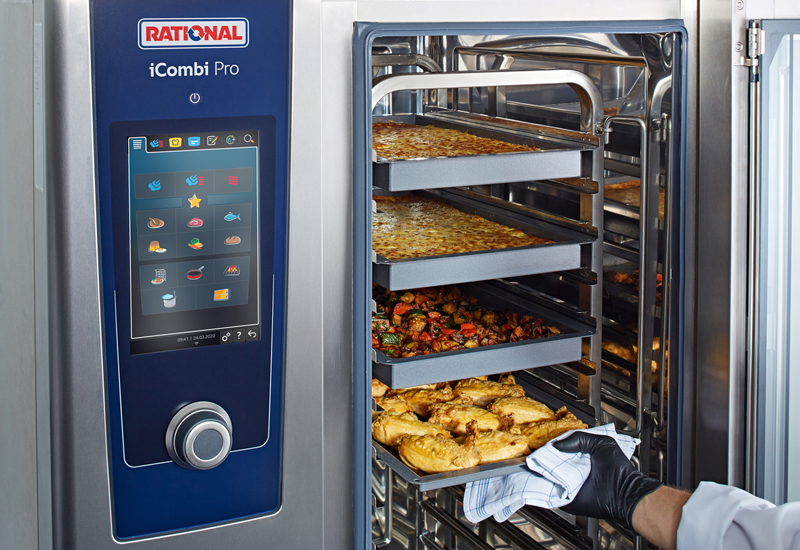
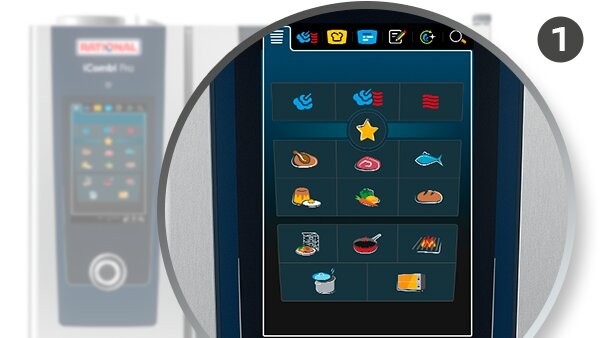
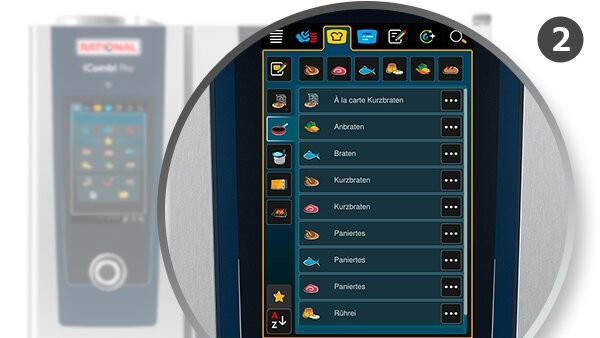
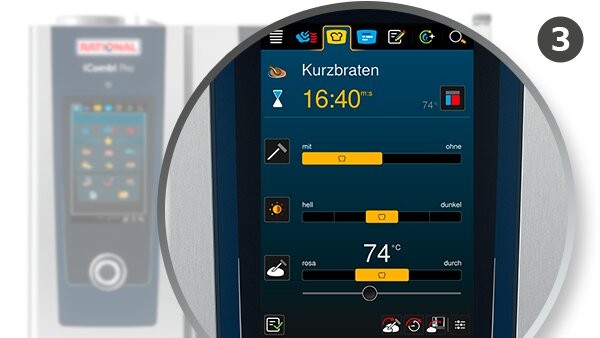
Equipment like the RATIONAL iCombi Pro and the Vulcan Combi are helping operators rethink traditional cook line design in modern commercial kitchen equipment planning. We help operators explore how combi oven cooking systems fit into real-world restaurant kitchen design and layout. Our Spokane, Washington showroom offers live demonstrations where you can see how a commercial combi oven improves speed, consistency, and kitchen workflow efficiency.
We host public demos regularly and we also offer private combi oven demonstrations tailored to your restaurant concept and commercial kitchen design needs and kitchen layout.
by BSR Marketing | May 12, 2026 | Uncategorized
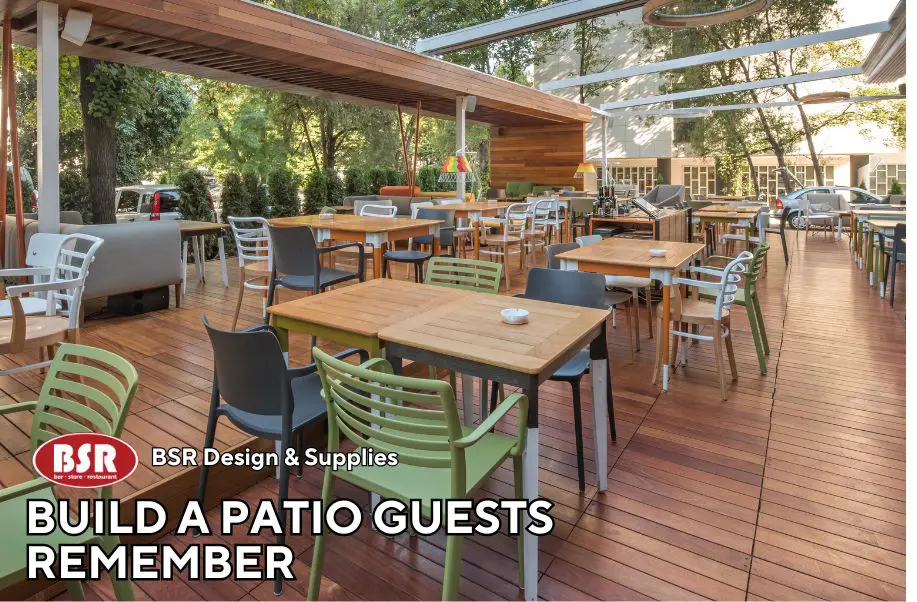
A well-designed restaurant patio is no longer just extra seating, it’s an extension of your operation, guest experience, and revenue potential.
The best restaurant patios are designed to maximize seating without sacrificing flow, comfort, or service speed. Whether you operate a coffee shop in Boise, a brewery in Idaho Falls, or a full-service restaurant in Twin Falls, your patio layout directly impacts ticket times, table turns, and revenue potential.
Here are five restaurant patio ideas that help improve efficiency while creating a better outdoor dining experience for guests.
1. Patio Furniture That Supports Operations
Commercial patio furniture should help operations run smoother, not slow them down.
The right furniture improves movement throughout the patio and makes it easier for staff to clean, reset, and adapt seating during service. Patios often need to shift throughout the day depending on reservations, group sizes, or weather conditions. Flexible furniture allows operators to make quick adjustments without disrupting guests or slowing service.
High-performing patios are built around:
- Durable commercial furniture
- Lightweight, movable seating
- Easy-clean surfaces
- Layout flexibility
The best patio setups support both guest comfort and operational efficiency.
2. Where Durability Meets Design
The best restaurant patios balance functionality with design. Furniture needs to be durable and easy for staff to move, clean, and reset quickly during busy service. At the same time, the look and feel of the patio shapes the guest experience and becomes part of your restaurant’s brand.
Current outdoor dining trends are moving toward:
- Warm, hospitality-driven patio designs
- Mixed material finishes like metal, wood, and woven textures
- Lounge-style seating areas
- Neutral earth tones with bold accent colors
Operators are also leaning into designs that feel less “commercial” and more like an outdoor destination. The key is choosing commercial patio furniture that delivers both style and performance. Durable materials help operations run smoothly while still creating a patio guests remember.

3. Lighting That Shapes the Patio Experience
Lighting plays a bigger role in outdoor dining than most operators realize. It doesn’t just help guests see, it sets the tone for how the entire patio feels.
Well-planned patio lighting creates warmth, comfort, and atmosphere that encourages guests to stay longer and enjoy the space. It can turn a simple outdoor seating area into a destination that feels inviting during both early evenings and late-night service.
Most Common Outdoor Patio Lights:
- String Lights (Bistro / Fairy Lights)
- Wall Sconces & Outdoor Lanterns
- Post Lights & Bollard Lights
- Pendant Lights & Overhead Fixtures
When lighting is done right, it enhances the guest experience without drawing attention to itself. It quietly shapes mood, improves comfort, and defines the personality of the space after sunset.

4.Guest Comfort Drives Revenue
Seating capacity matters, but guest comfort drives higher check averages and longer stays. Guests are more likely to order another drink, appetizer, or dessert when they feel comfortable in the environment. That’s where intentional outdoor dining restaurant design makes a direct impact on sales
Poor seating, harsh sunlight, uncomfortable temperatures, or loud layouts can shorten visits and reduce check averages.
The best outdoor dining spaces focus on:
- Comfortable seating angles
- Shade Solutions
- Wind Management
- Proper Seating and space between tables
A comfortable patio experience encourages guests to stay longer while helping restaurants maximize revenue per table.
5. Year-Round Patio Equipment
Restaurants across Idaho are investing more heavily in outdoor dining upgrades because patios now operate as true revenue centers rather than seasonal add-ons.
The right setup can help restaurants keep patios comfortable and functional well beyond peak summer months.
Features like:
- Patio heaters
- Umbrellas
- Wind barriers
- Flexible outdoor seating (Stackable Chairs, Waterproof Furniture, ETC)
can significantly extend patio usability throughout the year. Guests remember how a space feels just as much as the food itself. The goal is to create a patio environment that guests want to stay in longer while maintaining operational efficiency for staff.

Looking to Upgrade Your Restaurant Patio?
BSR delivers expert foodservice design, equipment, and supply solutions for Idaho restaurants and hospitality businesses.
Whether you need:
- Commercial patio furniture
- Outdoor dining layouts
- Restaurant design support
- Foodservice equipment
Our team is here to help create a patio built for comfort, efficiency, and long-term performance.